
Road Cookin' Field Note
A Two-Cooler Plan for Safer Meals on a Hot Driving Day
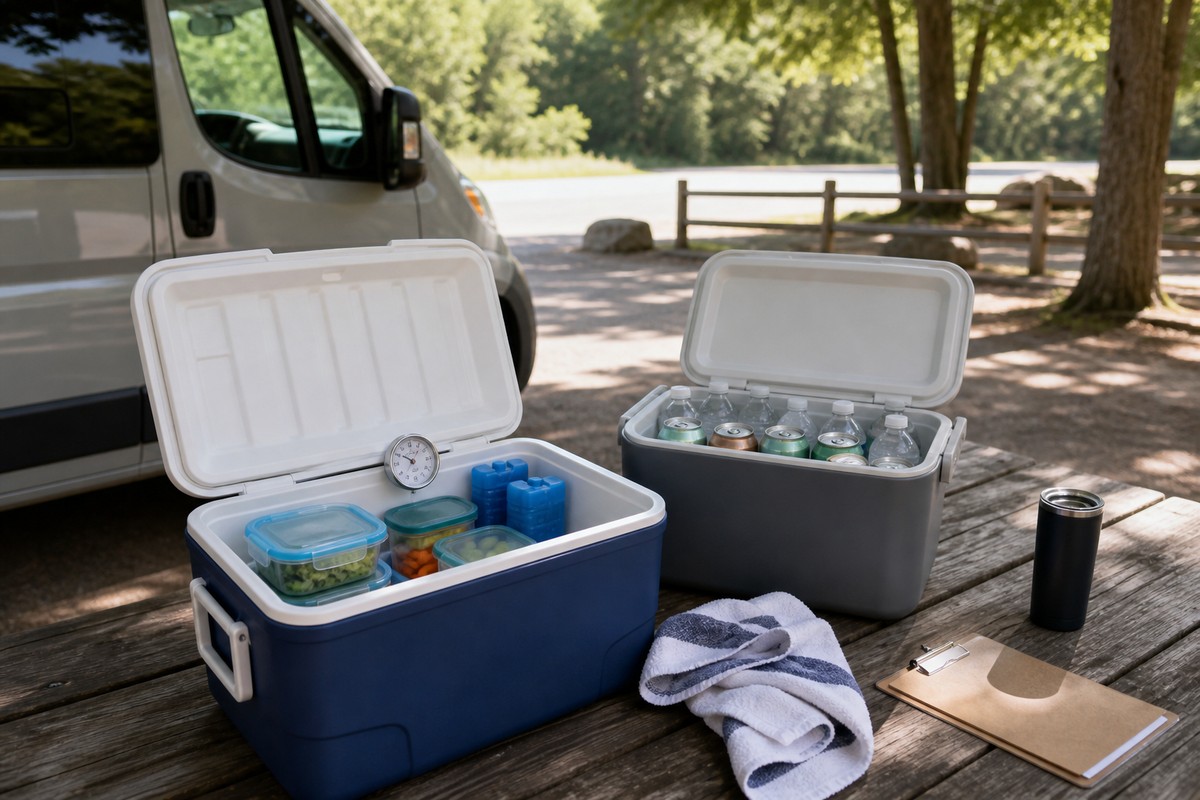
A cooler can be full of ice and still be hard to manage on a long driving day. Drinks are opened often, lunch gets buried, meltwater collects around loose packages and no one remembers how long the sliced fruit sat on the picnic table. A two-cooler plan solves the traffic problem before it becomes a temperature problem: one insulated box stays dedicated to perishable food, while the second handles drinks and frequent-grab items.
This is not about buying matching equipment. Two clean insulated containers of suitable size can do the job. The useful part is deciding what belongs in each one, loading them while everything is already cold, and giving the food cooler a thermometer and a short opening routine.
Why Separate Drinks From Perishable Food?
The USDA Food Safety and Inspection Service specifically recommends bringing two coolers when possible: one for drinks and snacks and another for perishable food. Its food-safety guidance for hiking, camping and boating explains that frequent openings let warm air into the cooler. A drink cooler can tolerate that routine better because the food cooler remains shut until the meal stop.
Label the purpose without relying on a paper sign that will get wet. A colored handle wrap, a different towel under the lid or a consistent position in the vehicle is enough. Everyone traveling should know that the food cooler is opened by plan, not whenever someone wants water.
Begin With Cold Food, Not a Warm Cooler
Chill the food and drinks before loading. A cooler is best at maintaining cold temperatures; it is not a fast refrigerator for warm leftovers. Freeze reusable cold packs or water bottles in advance, and pre-chill the empty cooler if it has been sitting in a hot garage or vehicle.
Put an appliance thermometer where it can be read quickly. USDA's refrigeration guidance says cold storage should remain at 40°F or below and recommends an appliance thermometer when there is no built-in display. The number turns a vague hand test into a decision you can record at fuel and meal stops.
Load the Food Cooler in Meal Order
Use sealed, leak-resistant containers. Keep any raw meat or poultry tightly wrapped and below ready-to-eat food so drips cannot reach fruit, sandwiches or cooked leftovers. Place the last meal of the day deepest and the first planned meal nearest the top. Fill empty space with cold sources rather than warm air when practical.
A simple map helps: breakfast on one side, lunch on the other, cold packs between them. Do not turn the cooler into a pantry. Shelf-stable crackers, unopened nut butter, whole fruit and other foods that do not require refrigeration can ride in a dry tote, leaving cold space for items that truly need it.
Set One Short Opening Routine
Before opening the food cooler, name what you need. Take out the full meal group, read the thermometer and close the lid. Return safe leftovers promptly instead of leaving the lid open while everyone eats. Keep both coolers in shade when the stop allows it, and do not leave them in direct sun beside the vehicle.
The USDA uses a two-hour limit for perishable food above 40°F, shortened to one hour when the air temperature is above 90°F. That clock is cumulative during the stop. When time or temperature history is uncertain, the safer choice is to discard the questionable food and use the shelf-stable backup. Smell and appearance cannot prove that a perishable item is safe.
Keep Clean Hands Outside the Cooler
Pack soap, safe water and a drying method where they can be reached before food containers are handled. The CDC's handwashing guidance lists food preparation and eating among the key times to wash and recommends scrubbing with soap and water for at least 20 seconds. If soap and water are not readily available, CDC advises a hand sanitizer containing at least 60 percent alcohol, although visible dirt should still be removed with proper washing as soon as possible.
Keep one clean utensil pouch and one closed bag for used tools. A towel that touched the ground or wiped a spill should not return to the clean side. The same split used for the two coolers should continue at the table: ready-to-eat food and clean tools on one side, packages and used items on the other.
The Five-Stop Cooler Log
Read the left column at each planned stop; use the right column for the one action that protects the next meal.
- Before departureLoad cold food, frozen cold sources and the thermometer.
- First fuel stopRead the food-cooler temperature without unpacking it.
- Meal stopRemove one planned meal group, then close the lid.
- Afternoon stopAdd ice or switch to shelf-stable food if temperature control is uncertain.
- Overnight stopDiscard unsafe leftovers, drain only when the cooler design and food packaging allow it, wash used items and reset for morning.
Plan the Meal Around the Road
A long route does not need an elaborate mobile kitchen. Choose one meal that can be removed as a unit and one no-cook backup that needs no refrigeration before opening. The existing Sample Menu and Road Cookin' Recipes can help with ideas, while the earlier overnight road-kitchen reset covers how to close out the day.
The two-cooler system earns its space by making good decisions easier. Drinks can move freely, food stays organized, the thermometer remains visible and the next meal is not a search mission. On a hot driving day, that is a practical safety margin rather than extra gear for its own sake.
Follow the cooler manufacturer's instructions and current public-health guidance. When a travel companion has a medical condition, pregnancy, advanced age or a weakened immune system, use additional care with food choices and ask a qualified clinician about individual risk.